Wednesday, April 30, 2008

Organic is Easy

Pssst. I have a secret.... Organic gardening is easy!

No, seriously! Especially for urban gardeners, with our smaller gardens to care for, going organic is pretty simple.

I believe the key is to relax and start with the basics. I mean, you're not a farmer, you're not required to comply with certification standards, and you don't have to become a specialist. Just start with the simple conviction that you will grow the most nutritious foods possible without using chemicals. This means swearing off:

  1. Miracle Grow and other chemical fertilizers
  2. Roundup and other weed killers
  3. chemical insecticides

Replace them with:

  1. compost
  2. mulch and a little weed pulling
  3. a spray bottle of soapy, garlicy water

Those three changes are probably the most essential steps in going organic, and I think the rest can be learned as you go. There's far too much to learn it all in one sitting, one season, or even one lifetime! Yes, you'll run across pests that are tougher than diluted dish soap, but you don't want to spray one of the harsher mixes until you really need to anyway (because they can kill off the beneficial bugs, too). And of course "100% organic" produce is grown from certified organic seed, but you're not a farmer at risk of losing your certification because you purchased some of your seeds from Home Depot.

It's also important to appreciate quality more than quantity. Your heirloom tomato plants might not start producing fruit the size of footballs the second you put them into the ground like some hybrids, but they will have exceptional nutrition and phenomenal flavor if you keep to organic growing methods.

Finally, be forgiving of yourself. If you lose a plant to an infestation of bugs, know that this happens to all gardeners, organic or not. Do some googling to learn how to prevent them next year and chalk it up to experience. Gardening leans heavily toward trial and error, after all, no matter how many books you've read.
Sunday, April 27, 2008

Pictures from Yesterday

I'm up early after an evening of cheap Pinot Noir. That always happens when I have a few too many glasses, but the nice thing about this morning's restlessness is that it was accompanied merely by a craving for Diet Dr. Pepper instead of by a headache.

So here I am with my giant cup of soda, thinking about what a nice day yesterday was. Chad captured much of it in pictures.

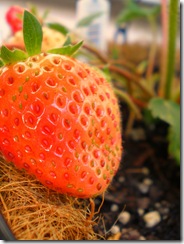
A few strawberries in the June-bearing basket are turning red, and this one looks soooo tempting.

BigStrawberry

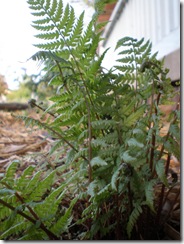
I was enamored by our Red Lady Fern, which was nothing but a pot of curly little twigs when we first purchased her.

RedLadyFern

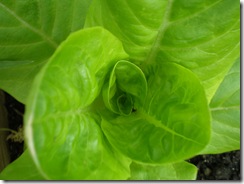
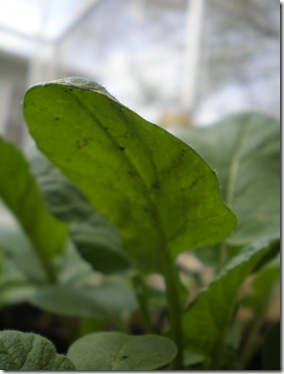
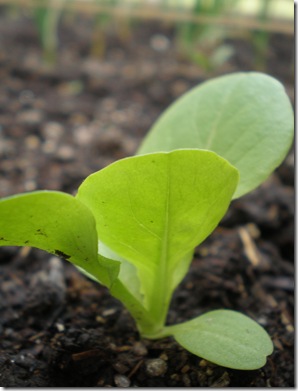
Chad started taking a closer look at some of the plants in the veggie garden, including the Little Gem Romain:

LittleGemCloseUp

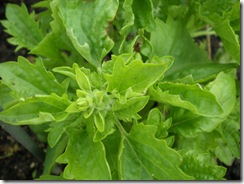
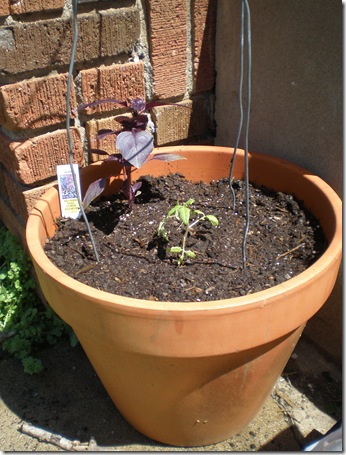
And the ruffly basil that lives between the Supersweet 100 and Genovese tomatoes:

RufflyBasil

As I tended the garden, I found that both the basil seeds and some type of grass or weed has sprouted around the tomatoes. I weeded the grass and put cardboard down on the areas where it was trying to grow and will look into buying some straw on the way out to my parents' house in the country later today. Straw makes a nice mulch for vegetable gardens..

Chad worked on part of one of the side flower beds, putting in our creeping phlox. It's a grassy, weedy bed that's had no preparation, but we couldn't really put weed block around a creeping plant we want to creep. So he brilliantly cut cardboard to fit the space, leaving holes for the still small phlox plants, which should kill off much of the weeds before it biodegrades and lets the phlox do it's thing. With some of my super cheap potting soil thrown on top, it's already looking a little prettier.

We then took a walk to the wine store and looked at all of the plants our neighbors have been putting in. These pink flowered bushes were one of my favorites just based on their solid color, and I simply must hunt some down once I learn what they're called:

PinkBushes

Can anyone tell me what they are? Perhaps I can catch the owners outside sometime and ask them.

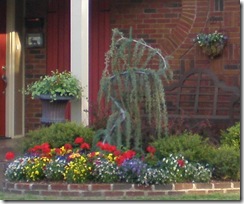
I'm also in love with this funky little tree, manipulated bonsai style:

FunkyLittleTree

I'm guessing it's related to a weeping cedar? Whatever it is, we saw a couple on our walk and I'm terribly fascinated.

Well, today should be lovely as well. Nice and cool, in the 60s. We're going to try and make it out to the arts festival for a bit, but I want to visit my parents and take them their tomato and strawberry plants. I'm really eager to see how the flower bed we planted out there is doing!

Thursday, April 24, 2008

Storms & Picture Updates

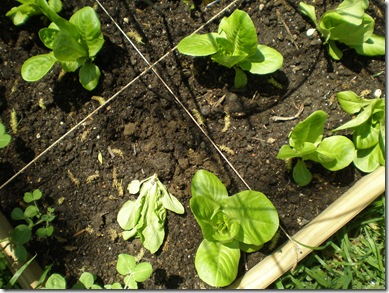
It stormed last evening, here in Oklahoma City, and it apparently took a toll on my lettuce.

P4240064

One Little Gem Romaine was somehow totally separated from his roots (I checked under everything for cutworms just in case, but no sign) and two (on the upper right) are looking a little beat down. I guess I'll have to give them some shelter whenever the rain comes in from now on.

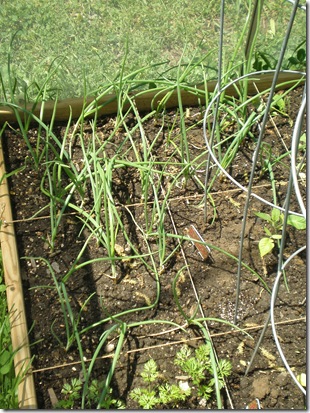
The onions have been growing like crazy, and they're sort of all over the place after last night's rain.

P4240071

I walk out there and see those three squares and am just so impressed. I'm definitely going to need to pull a few young onions as "pearls" to even out the harvest a bit.

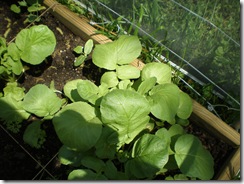
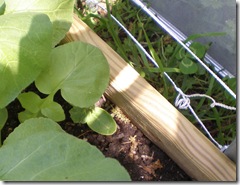
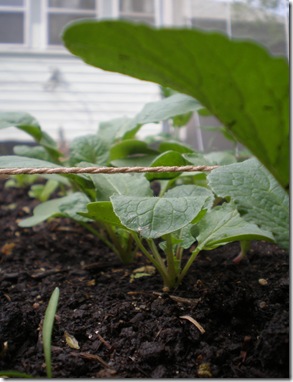
Our monstrously huge radish plants are overshadowing the still small cucumbers! We've harvested most of the really big ones around the left cucumber, but the right one is still hidden away. I'll clear the worst offending radish for tonight's salad and that should do it. The cucumbers should easily rise above the new crop of radishes I've been planting as we harvest.

P4240066 P4240067

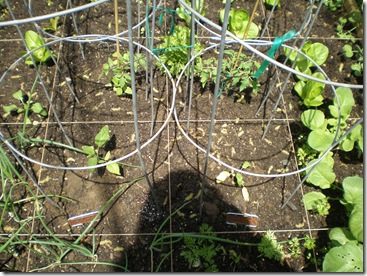
All of the young tomato plants look fine.

P4240072

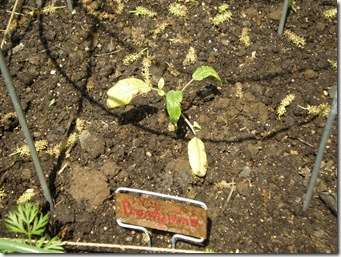
Even the brandywine that I thought I'd lose is perking up and getting green again. I'm keeping the extra seedlings on hand in case he takes another turn for the worse, but I think he's almost out of the woods. If he keeps improving, then I'll just leave him alone and let him do his best.

P4240074

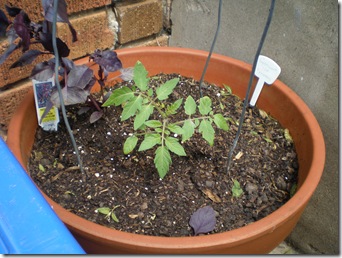
And, just for good measure, here's the potted Sweet 100 looking pretty great. I love looking at healthy plants like this and knowing I raised it from one teeny tiny little seed.

P4240081

Wednesday, April 23, 2008

So I'm a day late on the "Earth Day" post, but then again, every single day should be Earth Day. That said...

I want to comment, first, on what a wonderfully green thing vegetable gardening is. After you've picked up or ordered your seeds and compost, your vegetables' carbon footprint is nearly complete. It's far more fuel efficient to transport seeds and a bag of compost than months worth of veggies that are shipped from out of town, if not out of country. Try to purchase as much of the rest of your food locally grown/raised (from your farmer's market or food coop) as possible and the earth will love you, indeed! If we all did this, both we and our the local farmers would breath a little easier.

I'd also like to say that I've never understood people who disbelieve our effect on climate change. Not because I think "they're wrong and we're right," but because there are so many ways we effect our environment other than climate change. All that gasoline burning results in unhealthy smog, chemicals disposed of improperly end up in drinking water, junk takes up space in land fills that must be topped off, plastic ends up in the oceans where sea animals choke on it, and on and on and on.

Whatever side of the climate change debate you're on and no matter who is "right," there's no escaping your responsibility to this planet and future generations.

Sunday, April 20, 2008

Today's gardening activities:

~Watered and weeded (three mushrooms) the garden and other plants.
~Went to Target for Dr. Pepper but left with basil seeds instead.
~Went to Lowe's with Chad and purchased one bag of cheap potting soil, one bag of seed starting medium (the last one!), two bags of eucalyptus mulch, a tray of creeping phlox, and an amazingly beautiful fuchsia.
~Potted the last of the two Red Robin tomato plants I'm giving to my parents.
~Planted basil seeds in a cute little tin container for the window sill and mixed herbs in another.
~Put basil seeds with all of the potted tomatoes I'm going to give away and between the two brandywine plants in the garden.
~Admired Chad's work as he weeded, put down weed guard in, mulched, and finished planting the side flower bed.
We're not sure where we'll end up putting the phlox now, but it was meant for one of the side flower beds in the back. The fuchsia will most likely live in the biggest ceramic pot on our front porch.
The brandywine whose stem broke twice before being transplanted isn't looking so hot. I have a slightly younger brandywine seedling to replace it if necessary, but I'm actually really annoyed that it picked the day before the garden's photo shoot to wimp out on me.... Uh huh, that's right, a photo shoot. I'm not giving too much away yet, but my garden and I may soon taste a small amount of local fame! So, I need to get to bed! I want to sweep the porch and spruce things up a bit in the morning.

Good night, everyone!

Saturday, April 19, 2008

First Radish Harvest

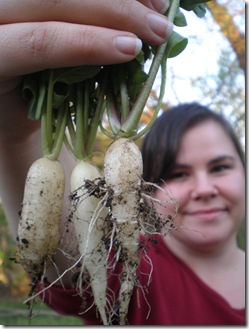
Yes indeed folks, we have our first mature radishes!

                P4180066

They're the White Icicle variety.  And, uh, yeah, that's my round face and bad hair day in the background.

I immediately seeded the spots left empty by this harvest, but the first batch of radishes I planted will probably be the last nice big fat ones I see until summer is over.  The one caution with radishes, which are so easy to grow, is that you don't want to leave them in the ground too long in the hot months of summer or their flavor changes and they can get spongy.  Pay attention to the "days to harvest" on the seed packet and pick them as soon as they're a usable size at all when it's hot.  You can start letting them grow big again in the fall.

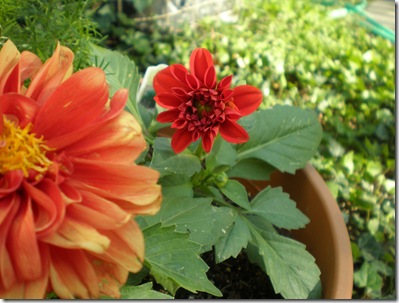
Meanwhile, we were surprised to see one of these vibrant orange Dahlias rebloom in a deep, deep red:

P4140055

Nature always has something up her sleeve.

Thursday, April 17, 2008

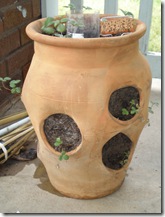
Strawberry Pot Watering System from Soda Bottles!

I absolutely hate my strawberry pot. It's difficult to plant and the water tends to just pour right out the side holes before reaching the lower soil. Lovely.

But seeing as I was up to my eyeballs in Alexandrias and Chad was so tickled by the idea of strawberries in a strawberry pot, I decided to give it a go again this year... with one adjustment.

You see, the lower plants never get any water if the water just pours out the sides. This seemed like something I could actually fix. A little googling revealed that some other gardeners drill holes in a length of PVC pipe, stick it in the pot, pour soil around it, and plant the strawberries. Very clever, verrry clever indeed...

But the only PVC pipe I had was too skinny and so ancient I was afraid it would leach scary chemicals into the soil and I really didn't want to go buy a new one and deal with drilling. So I decided to do one of my favorite things ever: reuse trash!

So, here's how to make a watering system for your strawberry plant....

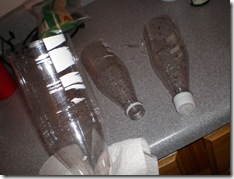
1. Dig small coke bottles out of the recycling bin. How many you need depends on how tall your strawberry pot is. (Mine comes up to my knees and I used three bottles.) Rinse them, remove their labels, and cut off the bottoms. Be sure to keep one of the caps.

P4050032

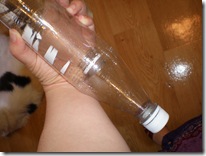
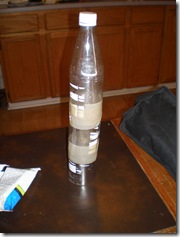
2. Now, you need to stick the bottles inside of each other, in a sort of daisy-chain way, to create a pipe effect. Tape them all together, sealing the seams well, with packaging tape. Please note that none of the "inside" bottles should have caps on!

P4050033 P4050034

3. Next step is to melt or drill holes in the bottles. With thin plastic like this, I'd vote for melting. Make sure you do this in a ventilated area. The basic steps are:

a. light a candle

b. hold a nail in the flame with a pair of pliers, not your bare hand

c. once hot, make holes by poking the nail into the plastic

You'll need to reheat the nail every now and then, but it makes for pretty quick work. (For illustrations on how to do this, see how I melted holes in the plastic caps for these recycled pots.)

4. Once you have a few holes in each of the bottles, put the cap on the one exposed bottle top and see how the system fits into the pot. As long as it's tall enough to come above the soil line, you're good! Trim the top bottle if it sticks way above the pot's lip.

P4050036

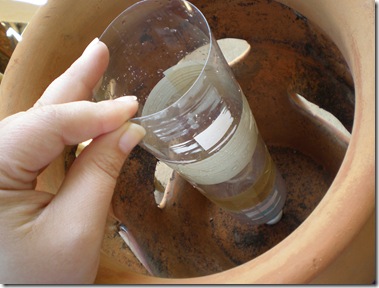
5. Once ready to go, hold the bottle in place and dump in enough soil around it to reach the first set of holes. It should stand fairly sturdy as you now continue to plant each of your strawberry plants. (Note that you may want to stuff a cloth in the top while you pour in the soil, to avoid getting soil in the watering system.

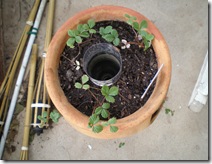
My end result:

P4170065 P4170066

It works well, but I do wish now that I'd trimmed down the top bottle just for appearances. But all of the plants that looked healthy going into the pot look healthy after a couple weeks of living there. I'm pretty pleased with how evenly this seems so moisten the soil, and I think the plants are pretty happy about it too. The only drawback I can really think of is that all plastic (even PVC!!!) starts leaching chemicals as it ages. I'd probably replace the tower of bottles every year, which shouldn't be too tough once the pot is filled with roots.

Wednesday, April 16, 2008

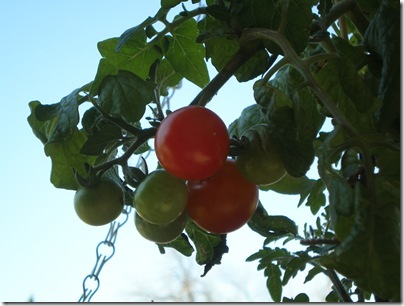
Ripe Cherry Tomatoes!

Behold!  My first ripe tomatoes of 2008!  P4150065

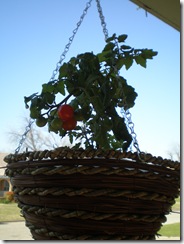
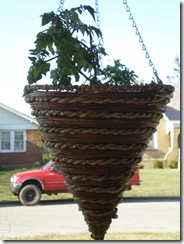
They're on one of my Red Robin plants, which are tiny enough to keep in hanging planters.

P4150081 P4150072

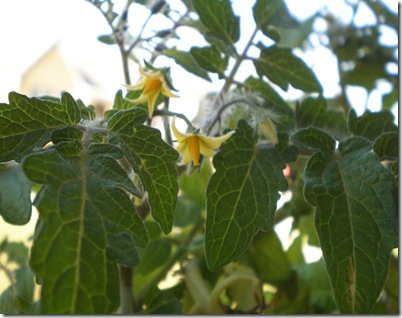
The other doesn't have any fruit at all yet, but it is finally covered in tiny little flowers!

P4150073 

Seriously, these plants are amazing.  They aren't the prettiest tomato plant I've ever seen, with their curly leaves and tendency to slump right over, but they're producing blossoms and fruit despite getting no direct sun at all.  They spent the winter months getting a little through a south window and have been hanging in total shade on my north-facing porch ever since.  Pretty impressive, huh?

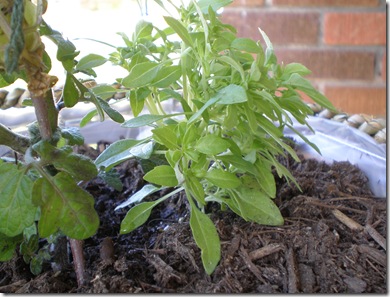
Oh, I also found two adorable small-leaved basils to pair with them in their pots.  They're bushy, so they probably won't get too horribly ugly and leggy being in the shade.  I <3 these little basils!

P4150074

Monday, April 14, 2008

Last Frost (I Hope!) and Tomato Planting

  Oklahoma City's average "last frost" is listed somewhere between early and middle April (depending on what source you're using), and last night was just about at 32.  We brought in many of the plants and covered the rest, including the garden.

P4140043  P4140042

P4140040 P4140041

Everything made it through the night without a problem.  I'm not even totally sure it got to freezing at any point.

But the really wonderful thing is that I'm pretty sure that's the last night we have to worry about freezing temperatures at all.  Before I'd even finished my coffee this morning, I was out in the garden planting the tomatoes!  The results:

P4140058

P4140051

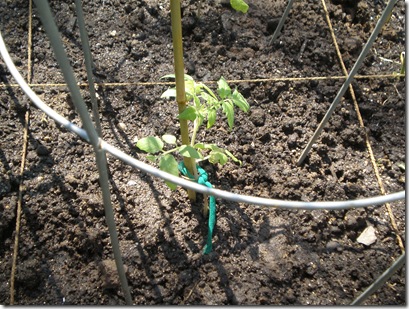
They look so tiny now that they're up to their necks in garden soil!  It was sad to see them go from looking like impressive tomato plants to itty bitty seedlings again, but I'll appreciate myself for that later in the season though, when they're growing strong because of their deep, fabulous root systems.  I'm really going to have to work at containing them in their cages, but at least the cages seem quite sturdy once all four have been tied together.

So, what tomato plants wound up in the garden?

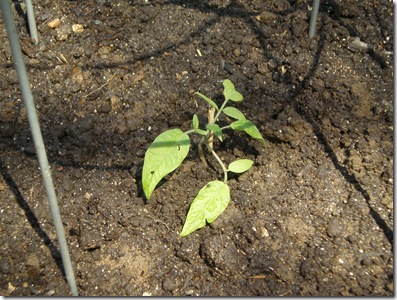
Two Pink Brandywines:

P4140056 

P4140057


One Supersweet 100:

P4140053


One Genovese:

P4140052

The Genovese is a new plant I purchased for 75 cents at the farmer's market this Saturday.  The third Brandywine I was going to put in the garden is still clearly stunted from lack of water when it was a tiny seedling, so it's not likely to ever produce much.  I'm keeping it in a small pot for a little while just incase anything happens to the other Brandywines, but he's pretty much out of the running now.

I also planted the other Supersweet 100 in one of my largest pots, added a purple basil (I always try to pair a basil with my tomato plants!), and set it just outside the back steps:

P4140049

He looks positively dwarfed next to that full-grown basil!  But it's all for the sake of a good root system, and soon he'll be the one doing the towering.

As for the hanging Red Robin tomato plants, one of them has two reddening tomatoes!  I'll surely take photos and gloat as soon as they're ready to pick.

Saturday, April 12, 2008

Mysterious Pictures...

These pictures mysteriously manifested on my camera the other day.... the same day the camera mysteriously moved to Chad's office, oddly enough!

That's the nice thing about having a husband with a much better "eye" than I have: all the lovely pictures.

P4070102

(Little Gem Romaine)

P4070103

(Radishes)

P4070104

(Radish Leaf)

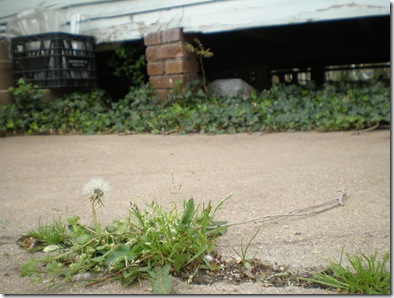
P4070110

(A crack in our back driveway, with a view of the ivy beneath our laundry room.)

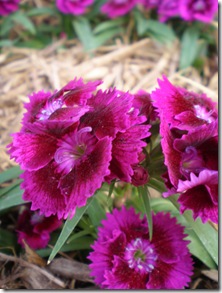
P4070116

(Flowers in the front bed.)

P4070111

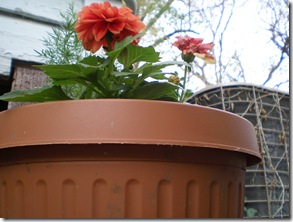
(The flower pot I brought home from my parents' house.)

P4070097

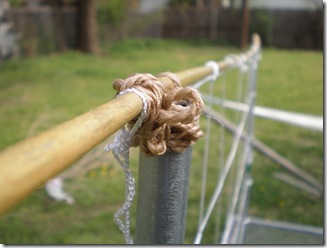
(Trellis.)

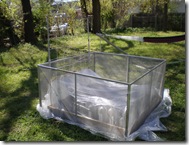
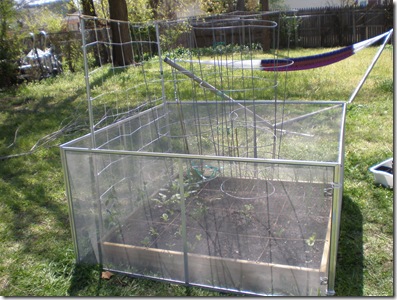
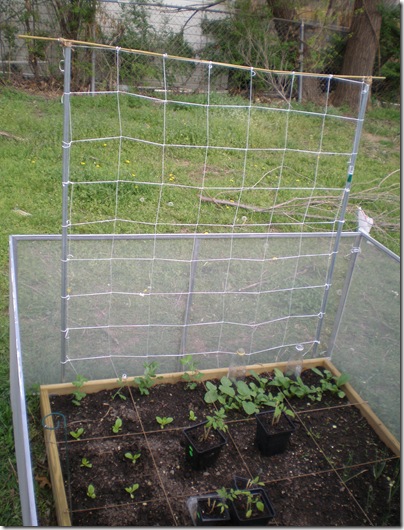
He's also extremely practical to keep around. He constructed the raised bed box, rigged up a little "fence" out of window screens to keep the stray cats from doing their business in the garden, and built the trellis:

P4070096

So, yeah. He's a keeper.

Friday, April 11, 2008

June-Bearing Strawberries

Strawberry update!!!

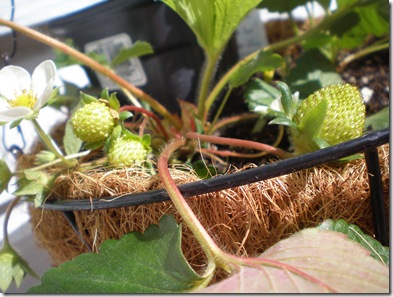
I have a basket of June-bearers just outside my back door that is just a pleasure to watch. First of all, the older of the two plants in that basket is already growing strawberries!

P4100149

The plant on the other side of the basket has been in it's sunny little home for only a day. You see, I'd decided I had more than enough strawberry plants with all those Alexandrias... but I'm still so drawn to them! So I stopped by the garden center at hell Wal-Mart while running an errand there yesterday and looked at all of their lovely strawberry plants. Some had berries already, but looked like they were in terrible shape. (Actually, just about everything was in bad shape there. I don't know if it was because they weren't sheltered in the recent storm or because it was Wal-Mart.) But next to those were beautiful, broad-leafed strawberry plants boasting a claim to pink blossoms, and all I could think about was how lovely that would look paired with the white-blossoming plant above.

I touched and sniffed and looked for interesting leaves. Then I picked up one plant and it seemed to tug right back, unwilling to leave its brothers and sisters. A little gentle investigation revealed that it had set out two runners into the separate pots of two other plants, so this was in fact three strawberry plants in one. At 88 cents a pot, how in the world could I pass up an experiment like this? I snatched it right up.

Once home, I snipped off the larger of the baby strawberry plants and put it in a pot. It already had a good start on its roots, you see, so it was time to take that work load off of the mother plant. The other one only had a few roots though, so I rigged up the set up you see below:

P4100147

Basically, I potted the mother plant in her forever-home then dug a shallow indentation next to her so that I could pot the baby separately without cutting the runner it was attached to. I'll give it a few days to establish itself, then I'll "cut the cord" for the mother's sake.

That's the thing about runners. You end up with more plants, but the process takes a lot of energy from the mother plant. You have to cut the runners off if you want berries from the mother. If you don't want to sacrifice berry production in order to gain baby strawberry plants, then you want to cut the runners at first sight.

That said, you can also use this method to increase next year's berry yield significantly if you're in a warm environment or can otherwise over-winter the plants. Pinch off any blossoms as they appear, let those runners take root and grow a bit before cutting the cord, and then you'll have tons of plants for next year.

As for me, I'll stick with these two runners and snip anymore that show up. I really only got the June-bearers for instant gratification. Next year, I should be up to me ears in berries from the ever-bearers!

Sunday, April 6, 2008

Flower Beds

Gosh, what a wonderful day! I visited my parents, as I do on most Sundays, and it just so happened that my mother was making quite a project of the flower beds today. I drove into the driveway and saw two huge trays of flowers. One of Mexican heather, the other of vibrant orange dahlietta. It wasn't long before Mom and I were planting them between the rose bushes in the otherwise empty front flower bed, and then a large group of us (Mom, Dad, Grandpa, and Betty [grandpa's girlfriend], and I) tackled the bed in the back yard.

We learned someone else's lesson while prepping the back flower bed. If you're going to put down tons of river rock in your "flower bed" so you don't have to deal with planting anything, you really should put down landscaping fabric first if you ever want to grow anything there again.... or if you care at all about others who may wish to grow something there. It all just sinks into the ground. We raked out huge piles of rocks before we decided to just level it out, add topsoil, and just deal with what was left. After much debate as to how to best arrange the bed, we had all of the plants laid out. Mom and I armed ourselves with spades and small pots of compost and started digging holes. It was hell digging through that rocky soil! There's no way we could have gotten them all out by raking, so we were glad we'd decided to just deal with it spot by spot. We made sure every flower had some loose soil around it with minimal rock and a scoop of compost, and this is how we slowly populated the bed.

Mom kept thanking me, but I was absolutely loving it. Even digging through rocks wasn't so horrible once we saw the results. She then had me pot a small fern and two remaining dahliettas that she intended to put on the front porch, but she ended up sending it (along with one spare dahlietta) home with me as a thank-you. I felt a little bad, because I know she loves ferns, but she insisted and I have to admit that I really thought it was a lovely combination.

I arrived home to discover that Chad had erected the trellis for the garden (YAY!) and planted some bushy little perennials in the narrow bed on the west side of the house. I presented him with the spare dahlietta and he decided that he would also plant it, with some purple flowers we have, in that bed as well. He's doing such a great job with the beds! I'm going to take a ton of pictures when they really start taking off.

Next week, I'll take two Red Robin tomato plants and two strawberry plants to my parent's house. They didn't do a vegetable garden this year since they just moved to that house, and I know it'll cheer them up to have some cherry tomatoes and strawberries on the patio.

I also happened to snag all of the nursery pots... They were a pretty bright green and incredibly sturdy for "disposables," so I'm going to use them next year for my seedlings. No more ugly, flimsy pots!

Friday, April 4, 2008

Prehistoric Monsters Squash Bugs

I confess.... I'm a little scared of squash bugs.

SqBug

*shudder*

These ugly dudes totally destroyed my zucchini plant in 2005, positively laughing at my spray bottle of soapy water the whole time. I hated them. Hated them. And back then, I didn't even know what they were.

Now I know that they're one of the toughest garden pests to kill, even if you stoop to nasty chemicals. The answer is prevention and determination.

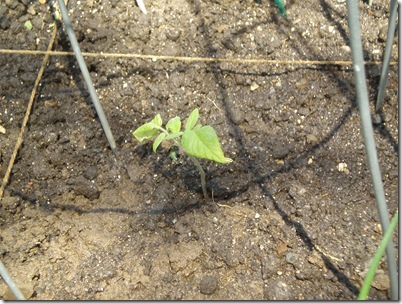
As one of the top rules of pest control is to never plant a crop you had trouble with in the same place the following year or two (the creepy crawlies could be hibernating!), I went the extreme route and swore off all cucurbits in 2006. In 2007, I ventured a cucumber plant on my front porch instead of out back. Now, I have two healthy looking cucumber seedlings in the garden out back. Cucumbers aren't the squash bug's #1 snack option, but I still view this as a bit of a test. Can I hold them off??? If so, I'll consider zucchini and pumpkins again next year.

And fortunately, many of the measures to be taken against squash bugs are also to be taken against cucumber beetles. My plan of action:

  1. Protect them while they're young. I currently have soda pop cloches over the seedlings, and I'll see if I might be able to cover them with a hanging plastic sheet once the trellis is in.
  2. Surround the cucumbers with plants the bugs dislike. There are already radishes sharing the same square feet as the cucumbers, and I'll grow a pot of marigolds or two to put just outside their section of the garden.
  3. Be obsessive. Especially while they're young, I'll check under their leaves every day for anything that looks like a bug or an egg. Catch the scout and you may prevent the rest of the invasion.
  4. Trap crop. If I do end up with the dreaded bugs, then I'll buy a squash plant and put it nearby. With any luck, those suckers will move on to what they view as greener pastures and I can hand pick (with gloves!) what's left.... and then they'll all go bye-bye into the trash bin.

Ugh! Really, they look like little prehistoric monsters! *shudder*

Wednesday, April 2, 2008

Garden Plan

I thought it might be fun to share the layout plans for my Square Foot Garden. Everything you see below is already in the garden (most of them as tiny plants, a few still as seeds), except for the tomato plants. Those are, however, sitting out on the garden since they're pretty successfully hardened off. I only bring them in for bad weather and very cold nights, now.

Note that North is to the left side of the picture. This means that most of the sun will be coming from the right side. There will be a trellis on the east (top) side.

If you consider subsequent plantings, you can see that this mere 4x4 garden can produce a lot.

The only thing I'm skeptical about is keeping the tomatoes under control. I'm using 5 foot tall cages that I'll tie together for a little extra support (the cages will be really crammed together in the first place) and I'm going to have to train them to stay in the cages as best as I can. We plan on having another box next year, so I'll probably put them along the outside like I have the peas and cucumbers. This way, they can grow outward all they want. Alternatively, I might do a long, narrow SFG box just for the tomatoes.

In addition to the above garden layout, I'm also growing baskets and pots full of strawberries and already have two full-grown Red Robin Tomato plants hanging on the front porch. I will also most likely grow the spare cherry tomato seedling I have in a large pot on the front porch. These babies are Super Sweet 100s, so I'm really hoping to be overwhelmed by bowls a bowls of cherry tomatoes! Especially since Brandywines take a while to fruit and aren't known for being especially prolific.