Showing posts with label reuse. Show all posts

Tuesday, April 7, 2009

Gardening on a Budget: Containers

This topic could turn into a huge post, but I'll try and keep it simple. The most basic commandment of container gardening on a budget is: Try and view everything you come across as a potential container.

Everything.

I've seen old boots, blue jeans, and broken down cars turned into containers. Practically anything could work if you get creative enough!

Funkiness aside, there are some pretty good standbys that thrifty container gardeners fall back on often...

  • Food grade buckets. Sometimes you can get these for free from food establishments, and they're a good size for plants that need a little more room to spread their roots.
  • Big plastic tubs. Again, these can come in good sizes for plants that need legroom. Some people have also converted them into DIY Earthboxes.
  • Trashcans as huge planters. Some of the larger tomato plants could even flourish in a big enough trashcan.
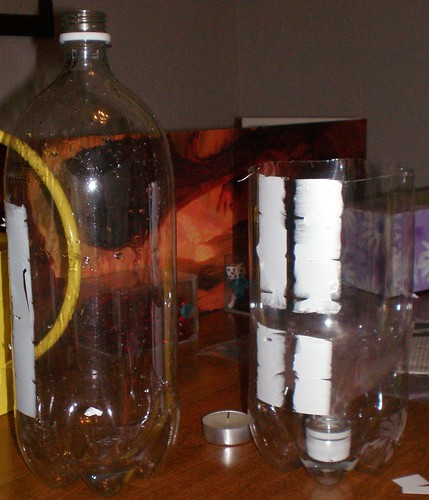
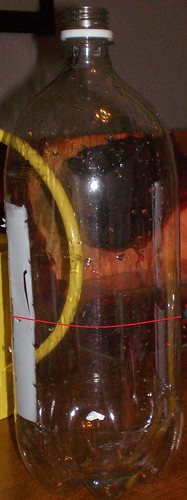
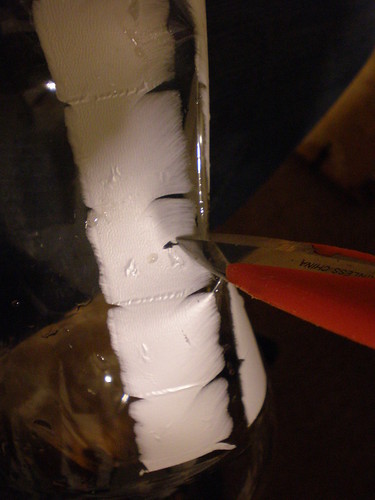
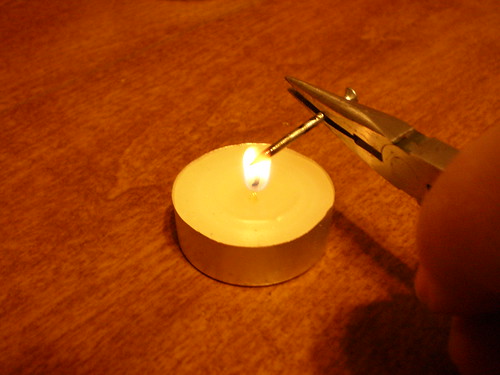
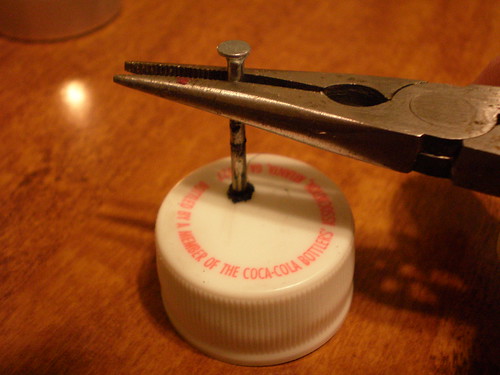
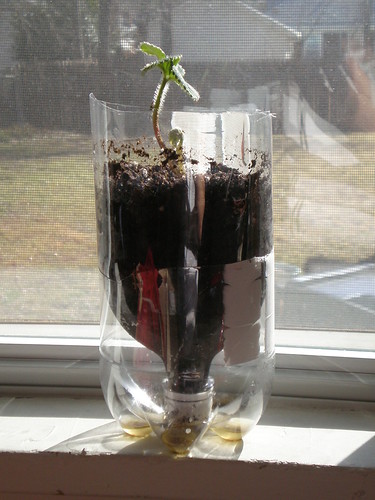
  • Two-liter bottles. Check out this older post wherein I illustrate how to turn one into a pot with drainage.
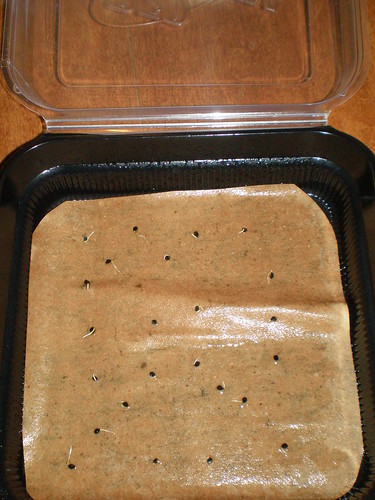
  • Plastic butter/spreadable cheese/yogurt containers, for smaller plants. Reserve the lids to use as water trays, but be sure to water slowly to avoid overflow.
  • Soda bottle, upside-down, as a DIY Topsy Turvy. Is there nothing these plastic beauties can't do?!
  • Really ugly pots that you already have or find free/cheap.... just turn them upside down and spray paint the pots to spiff them up. (Avoid getting paint inside the pots.)
There are so many other options, but these tend to be fairly accessible and easy. Just remember to avoid anything that held chemicals, clean everything out before planting, and drill holes in the bottoms for drainage when necessary.

If you want to find "real" pots at good prices, there are usually plenty of cheap options at discount stores like Big Lots and Wal-Mart. The dollar tree often has really cute little pots, but they usually need to have drainage holes drilled in them. End-of-season sales are a great way to find deals at local businesses, which we should all support whenever we can.

Plastic is usually the cheapeast option... But if you'd like to avoid plastic, terra cotta is probably the cheapest way to go.

And take care of your pots so you don't have to spend money replacing them. Put them away when not in use (especially over winter) and treat even the plastic ones as breakable.

I know there are a million and one other tips out there, so please share yours!

Sunday, March 15, 2009

Gardening on a Budget: Soil

Especially if you're a container gardener who wants to grow organically, the cost of soil can start looking pretty high. So let's look at a few ways to cut back on that cost.

  1. Screw the fancy "organic" soil that companies like Miracle Grow sell, because it's way expensive (and not all that great, in my experience). Instead, pick up those 40 pound bags of cheap soil with "compost" in the ingredients rather than "fertilizer." They're sometimes cheaper than that small bag of "organic" soil, and I've had great luck with them.
  2. If you're growing in-ground or in a raised bed, you don't need to add new soil every year. Compost is usually all you need to add.
  3. If you're a container gardener, you can often reuse your potting soil. The most important rule is to never reuse soil from diseased plants -- that stuff needs to be thrown into the deepest darkest corner of land where you won't grow anything you care about. If, however, your plants were healthy and strong, you can take out the old plant, mix in some compost, and reuse. Some people feel it's necessary to bake the soil (yeah, as in baking it in an oven), but I've never bothered. When I'm not 100% confident about reusing a pot of soil (often because a cat used it as a litter box!), I'll use it for non-edible plants just to be safe... or I'll use it to fill in holes in the backyard.
  4. Don't use containers any bigger than your plant will actually need.
  5. Use companion planting in you container garden. For example, why put basil plants into their own little pots if you're also growing potted tomatoes? Basil and tomatoes love each other, so go ahead and tuck that basil plant into the corner of the tomato's pot.
As a side-note, I don't recommend just sticking yard dirt into a container, especially if you plan on bringing it inside. Part of the benefits of container gardening is reduced pests and weeds, and yard dirt is full of them.

Saturday, January 31, 2009

Gardening on a Budget: Seed Starting

There are hundreds of fun and fabulous seed starting products out there, but you don't have to spend all that money. If you can at least invest in a bag of Seed Starting Medium or very lightweight potting soil, that alone will get you off to a great start.

Cheaper Than Peat Pellets/Pods:
Those seed starting pods or pellets, the kind that come looking like little disks then expand in water to look like a huge brown marshmallow, are admittedly handy. However, you can imitate these will little effort and money:

1. Save the tubes from inside your toilet paper rolls.
2. Cut a tube in half, resulting in two shorter tubes. 
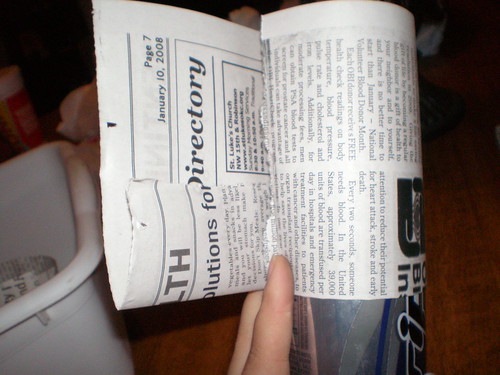
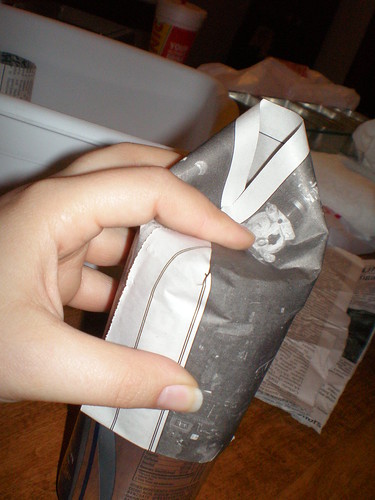
(Note that this is optional. You could use the entire tube if you feel like the plants you're growing need more room for their roots to stretch out before they are transplanted or moved to a larger container.)


3. Take one of those half-tubes and decide which end will be the "bottom" of your peat pod. Make a few cuts in the bottom of the tube so that you will be able to fold it in on itself.


3. Fold in the bottom of the half-tube, making sure the bottom of it is mostly closed. Repeat until you have as many folded half-tubes as needed.


4. Place these tubes in a water-proof tray of some sort.


5. Fill each with seed starting medium or a lightweight potting soil.


6. Plant seeds as directed.
7. Water these by pouring water into the tray, not by pouring it directly onto the soil.
8. My general rule of thumb is to transplant these, tube and all, into a newspaper/Jiffy pot with potting soil soon after they develop their first set of "true leaves."

Cheaper Than Those Biodegradable Jiffy Pots: Jiffy pots are also very convenient, but there's a nearly free alternative to these as well. You'll need to make sure you have a tray or tub with sides as high as the pots will be tall, but you can make newspaper pots, the creation of which I illustrated last year.

Cheaper Than Fancy Trays: You can use damn near anything as a water-proof tray to hold your seedlings. I love using plastic food containers that used to hold things like bakery cookies. Plastic dish tubs from the dollar store are useful, especially when seedlings have been moved to larger newspaper or Jiffy pots. On the smaller scale, butter tubs (or a spreadable cheese tub, like I used in the pictures above) do well. Amazingly, Skinny Cow ice cream sandwich containers fit the toilet paper tube "pods" (and actual peat pods) perfectly, and they also fit right onto our windowsills. Just make sure that anything you use that once contained food has been cleaned out properly.

Cheaper than Grow Lights: Grow lights can help prevent leggy seedlings, but they're also pretty expensive. A cheaper option would be to hang an inexpensive shop light over your seedlings instead. Or, like me, you can simply grow your seedlings on south-facing windowsills and deal with the fact that they'll be a tad bit leggy. (Sunlight is FREE!)

Cheaper than Buying Plastic Seedling Cells: Some people buy the little six-pack plastic cells when, just last year, they might have purchased flowers from the garden center in a nearly identical six-pack. Whenever I buy flowers (or other plants) in cells or small pots sturdy enough to still be in one piece after removal of the flowers, I rinse that sucker out and stash it away in my garage to use for flowers from seed the next year. (They also work for most veggies from seed, unless they have delicate roots.)

Cheaper than Any of That Other Stuff: This won't work with some seeds (read your packets!), but sometimes you can wait until the appropriate time to direct-seed them into the garden. My favorite thing about this method, to be honest, has little to do with money... it's the fact that there's no hardening off to be done at all. How convenient.

That's about all I can think of at the moment. Please post and share your ideas!

Saturday, July 5, 2008

It's Been a While!

It's been a little while since I updated, but here I am now!

We've gotten two big cucumbers out of the garden lately, plus lots of cherry tomatoes!  In fact, I served a bowl of cherry tomatoes as a snack when we had friends over the other night.

Most exciting is our first full-sized red tomato of the season!  A Genovese, to be specific:P7050100We'll most likely pick and eat it tomorrow.

No more carrots in the garden until it's time to seed for the fall.  A few of the onion tops turned yellow, so those got pulled:P7020075 They'll probably be drying outside for about another day, then I'll bring them inside for use/storage.  Most of the others will be picked quite soon as well.

It's also time to start thinking about fall crops, around the Oklahoma City area.  Broccoli should be started inside ASAP, if you haven't done it already.  Here's my broccoli seedling set up on the kitchen window sill:P7050105 It's actually a Skinny Cow ice cream sandwich container!!!  This, if nothing else, is a perfect excuse to eat ice cream!  Not only does it sit perfectly on our windowsill, but our repurposed toilet roll seedling pots fit into each sandwich slot perfectly:P7050106 These little pots are extremely easy to make. Cut the rolls in half first if putting them in a short container like this, but otherwise follow these instructions over at You Grow Girl.  Just be careful not to over-water, because I find that these are more likely to grow mold than peat pellets.  But once the seedlings need more soil, you can transplant it, roll and all, into its next home.  It's totally biodegradable.

Anyone else prepping for fall gardening out there?!  Here's a fabulous fall gardening document for fellow Oklahomans, thanks to OSU.

Wednesday, January 30, 2008

Soda Bottle Pots

Time to raid the recycling bin!

This is a little trick I use when I don't have enough pots for relatively small plants. The single serving soda bottles are perfect for seedlings and the two-liters are great for something a little more substantial. Since my husband has a Diet Dr. Pepper addiction, I have a nearly endless supply of the two-liters....

Bottle Pots Before & After

Get a hold of your bottle, remove the label, and rinse it out. Now that it's clean, the first major step is to slice the bottle roughly in half. It'll take you a couple tries before you know just how deep you want each "half" to be. I usually cut mine just a bit below the half-way mark (as shown below), making the top part (which will hold the soil) as deep as possible. As long as the top half sits will in the bottom half, just go with whatever variation suits your purposes.
Slice the Pot in Half

The most attractive way to cut the bottle in half is to pick your spot, turn it on it's side, and saw through it carefully. You'll need either a fine-toothed saw or a very large kitchen knife you don't care too much about. Another option, though a less attractive one, is to hack at the bottle with kitchen shears. That's what I did this time around, since these pots are temporary anyway. To get it started, you may need to pinch part of the bottle and snip it, then unpinch it and start cutting your way around.
Start the Cut

Now you should have the makings of a soda bottle pot before you! If the top inverts into the bottom as you like, let's start thinking about drainage. Leaving the cap on won't allow any drainage at all, but taking it off will mean all of your soil washing into the bottom. The solution is to put some holes in the cap. If you have a drill handy, use that. If you don't, then here's what I do when I don't feel like digging out the drill for small jobs. Take a nail and hold the end of it in a flame with a pair of pliers for about 15 or 20 seconds. The blue part of the flame is the hottest, so aim for that.
Heat the Nail

Now, still using the pliers, quickly but carefully press the tip of the hot nail through the cap as shown below. If your nail is hot enough, it should melt right through with just a little pressure. Three holes should do it, but you'll need to reheat the nail between each hole. Please make sure you're in a well ventilated area so you're not breathing chemicals from the melting plastic.
Melt Holes

Put that cap back on the bottle, invert the top into the bottom, fill with soil, and plant! This one is pretty ugly. It was a rush job, just to get the baby strawberry plant into some soil. You can cut it much more nicely and even decorate it if the pot will be used long-term.
Finished Bottle Pot

When you're done with the pot, please don't forget to recycle it!!!

Tuesday, January 22, 2008

Onion Sprouts and Newspaper Pots

A few days ago, I decided to start some onion seeds....

I sprouted them in this plastic take-out tray. I cut a piece of paper bag to fit the bottom, sprayed it until it soaked up the water, and sprinkled onion seeds in. Once the top is snapped shut, it stays nice and moist. I kept them near a sunny window to stay warm. And tonight, they were ready to go.
Onion Sprouts

A close-up:
Onion Sprouts Close-Up

Time to put them into some soil! It's far too cold out even for cool-weather crops, though. Newspaper pots to the rescue! After a little trial and error, here's how I made them....

You'll need black and white newspaper, a soda can, a tray or small tub, a spray bottle, and potting soil.
Newspaper Pot Materials

Cut or tear black and white newspaper into single pages and then into into quarters.
Paper

Take one of those quarters and make any adjustments to size that would be appropriate for your purposes. I folded one edge over, as shown below, to make them shorter and more uniform.
Fold the Paper

Now, wrap the paper around a soda can, letting a couple inches extend beyond the top of the can. It should overlap itself. Notice that I have put my fold on the bottom, which lets the ragged end extend beyond the can.
The Overlap

Now we're going to form the bottom of the pot. At the overlap, fold the paper over the top of the can.
Fold #1

Fold it a second time, leaving just a point of paper.
Fold #2

Fold that final point down. Voila! You've just formed a biodegradable seedling pot!
Fold #3

But it's not going to stay together all by itself. I found that it helped to spritz the folds of the pot bottom as well as the edge of the overlap.
Dampen the Folds

Place them all in the tray or tub. They should be somewhat snug, so that they will help each other hold their forms, but not crushed together. Voila!!! Your very own biodegradable seedling pots for FREE!
Snug in a Tub

They held their forms quite nicely once they were all nested and filled with soil. Here I am making indentations for my onion seeds.
Pots Filled With Soil

I put in the 16 healthiest looking sprouted seeds, covered them, gently misted the soil with the spray bottle until it looked nicely moist on top, then poured water into the tub itself to allow the pots to soak it up. I'll primarily water them by misting heavily, since I didn't set up the tub to allow the pots to drain. (You could do so by putting a layer of rocks beneath them.)
Watering

I put plastic wrap over it to hold in the moisture and keep out the cats, and I'll make room for it in the sunny laundry room tomorrow.

Once ready to plant, I can just plop the pots in the ground and the paper will biodegrade and become part of the soil. If you make these, keep in mind that they aren't as sturdy and peat pots. You may want to double the thickness if you're concerned about them falling apart when you lift them out, but I plan on lifting them out with a kitchen spatula while holding them with my other hand. Once plopped in the ground, I want them to fall apart as quickly as possible.

One other note: I'd avoid color newspaper. I've read in more than one source that you shouldn't compost newspaper with colored ink if the compost is going into a vegetable garden, so I'd venture to guess that you should keep those colored inks out of your garden entirely.