Showing posts with label budget. Show all posts

Tuesday, February 9, 2010

Seedy Saturday and Baby Chives

This past Saturday, some friends and I got together for a seed exchange. We each brought whatever extra seeds we had, which amounted to a lot since we are all just backyard gardeners. Each person put their seed packets in a bowl and I set out coin envelopes to serve as our new seed packets (along with pencils for labeling). We then passed around the bowls and took samples of the seeds that interested us. Everyone seemed to feel like they came out a winner. We could all have variety in our gardens without going broke!

Give it a try. It's a great way to expand your garden and try new varieties on a budget. Throw in a veggie tray and some tea, and you'll have a pleasant afternoon of seeds and conversation!


I've started a few seeds lately. It may seem a bit early to traditional gardeners in this area, but that's one advantage of being a container gardener! You can put your plants outside on nice, sunny days (not that we have any just yet!) and bring them inside whenever they need protection from the cold.

I'm particularly tickled by my pretty chives pushing their way out of their soil.


I also have tomato, strawberry, parsley, and basil seedlings that I'll share pictures of when they get a little larger.

Saturday, January 30, 2010

Alpine Strawberries from Seed (Kit)

Speaking of cute kits, Target has these adorable little strawberry growing kits (as well as flower kits) in their dollar section for Valentine's Day. I've picked these up a couple years in a row, and they're pretty cool... but they're also an example of how a kit could result in frustration for a first-time gardener.

First of all, keep in mind that growing strawberries from seed isn't the easiest task for a beginning gardener. The seeds are minuscule, the seedlings dry out so easily, and they're delicate. It can be done, but you have to check on them daily and handle them carefully. Second, the kit suggests that 10 seedlings would flourish in virtually no space at all! It comes with a teeny tiny pot, a small packet of about 20 Alpine Strawberry seeds, and a pellet of growing medium. But trust me, you don't want to put 10 seeds in that teeny pot! It's not nearly enough room.

Instead:
  • Use something like peat pods (or my budget version: toilet paper roll pods) or seedling cells with seed-starter mix.
  • Put only one or two strawberry seeds in each pod/cell.
  • Water from the BOTTOM by pouring water in the seedlings' tray, because those tiny seeds could wash right away if you water from the top.
  • Keep everything consistently moist! These plants are so tiny that they dry out FAST when mere seedlings.
  • Later, you can harden them off and put the plants in hanging baskets or a strawberry planter... or maybe along the edges of your flower bed, as they are quite lovely little plants.
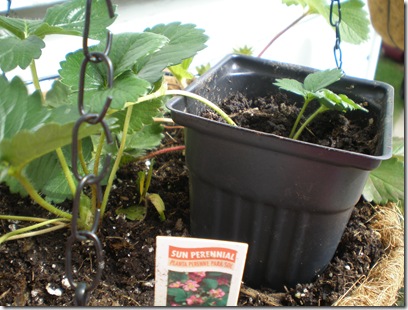
But let's not waste that gowing medium pellet and teeny pot. If you want, you can use them as directed but sow only one or two seeds in the little pot. Just don't over-water, because the pot has no drainage hole. You can also use the pot as a cute container to give away one of the seedlings when they're almost grown. I did this as a gift to a gardening friend of mine, a couple years ago. (In this case, you can hydrate the growing medium pellet and mix it into the rest of your seed-starting mix for another seedling project.)

Alpine strawberries are a small, everbearing variety. That means that, instead of one large harvest at once, it'll give you several small harvests. It's one of the easier varieties to grow from seed, and it's less likely to take over your garden if you put them in the ground. They're about as close to a "wild strawberry" as you'll get in a domesticated plant. They're fairly similar to Alexandria strawberries.

Monday, January 25, 2010

Cute Kits

I'm such a sucker for cute kits and convenience. If I were planning an in-ground garden this year, I totally would have snatched up one of these baskets at Lowe's the other day:
I mean, how perfect would this be for a small in-ground garden? And it comes in an adorable basket that's perfect for small harvests!

Could you get all of the contents cheaper? Yes, probably. Especially if you make a deal with other backyard gardeners and split that bundle of onions or bag of seed potatoes. But for the convenience, $10 isn't so bad. In fact, I think this could be the way to go if you're a new gardener or are growing these plants for the first time.

Tuesday, April 7, 2009

Gardening on a Budget: Containers

This topic could turn into a huge post, but I'll try and keep it simple. The most basic commandment of container gardening on a budget is: Try and view everything you come across as a potential container.

Everything.

I've seen old boots, blue jeans, and broken down cars turned into containers. Practically anything could work if you get creative enough!

Funkiness aside, there are some pretty good standbys that thrifty container gardeners fall back on often...

  • Food grade buckets. Sometimes you can get these for free from food establishments, and they're a good size for plants that need a little more room to spread their roots.
  • Big plastic tubs. Again, these can come in good sizes for plants that need legroom. Some people have also converted them into DIY Earthboxes.
  • Trashcans as huge planters. Some of the larger tomato plants could even flourish in a big enough trashcan.
  • Two-liter bottles. Check out this older post wherein I illustrate how to turn one into a pot with drainage.
  • Plastic butter/spreadable cheese/yogurt containers, for smaller plants. Reserve the lids to use as water trays, but be sure to water slowly to avoid overflow.
  • Soda bottle, upside-down, as a DIY Topsy Turvy. Is there nothing these plastic beauties can't do?!
  • Really ugly pots that you already have or find free/cheap.... just turn them upside down and spray paint the pots to spiff them up. (Avoid getting paint inside the pots.)
There are so many other options, but these tend to be fairly accessible and easy. Just remember to avoid anything that held chemicals, clean everything out before planting, and drill holes in the bottoms for drainage when necessary.

If you want to find "real" pots at good prices, there are usually plenty of cheap options at discount stores like Big Lots and Wal-Mart. The dollar tree often has really cute little pots, but they usually need to have drainage holes drilled in them. End-of-season sales are a great way to find deals at local businesses, which we should all support whenever we can.

Plastic is usually the cheapeast option... But if you'd like to avoid plastic, terra cotta is probably the cheapest way to go.

And take care of your pots so you don't have to spend money replacing them. Put them away when not in use (especially over winter) and treat even the plastic ones as breakable.

I know there are a million and one other tips out there, so please share yours!

Sunday, March 15, 2009

Gardening on a Budget: Soil

Especially if you're a container gardener who wants to grow organically, the cost of soil can start looking pretty high. So let's look at a few ways to cut back on that cost.

  1. Screw the fancy "organic" soil that companies like Miracle Grow sell, because it's way expensive (and not all that great, in my experience). Instead, pick up those 40 pound bags of cheap soil with "compost" in the ingredients rather than "fertilizer." They're sometimes cheaper than that small bag of "organic" soil, and I've had great luck with them.
  2. If you're growing in-ground or in a raised bed, you don't need to add new soil every year. Compost is usually all you need to add.
  3. If you're a container gardener, you can often reuse your potting soil. The most important rule is to never reuse soil from diseased plants -- that stuff needs to be thrown into the deepest darkest corner of land where you won't grow anything you care about. If, however, your plants were healthy and strong, you can take out the old plant, mix in some compost, and reuse. Some people feel it's necessary to bake the soil (yeah, as in baking it in an oven), but I've never bothered. When I'm not 100% confident about reusing a pot of soil (often because a cat used it as a litter box!), I'll use it for non-edible plants just to be safe... or I'll use it to fill in holes in the backyard.
  4. Don't use containers any bigger than your plant will actually need.
  5. Use companion planting in you container garden. For example, why put basil plants into their own little pots if you're also growing potted tomatoes? Basil and tomatoes love each other, so go ahead and tuck that basil plant into the corner of the tomato's pot.
As a side-note, I don't recommend just sticking yard dirt into a container, especially if you plan on bringing it inside. Part of the benefits of container gardening is reduced pests and weeds, and yard dirt is full of them.

Saturday, January 31, 2009

Gardening on a Budget: Seed Starting

There are hundreds of fun and fabulous seed starting products out there, but you don't have to spend all that money. If you can at least invest in a bag of Seed Starting Medium or very lightweight potting soil, that alone will get you off to a great start.

Cheaper Than Peat Pellets/Pods:
Those seed starting pods or pellets, the kind that come looking like little disks then expand in water to look like a huge brown marshmallow, are admittedly handy. However, you can imitate these will little effort and money:

1. Save the tubes from inside your toilet paper rolls.
2. Cut a tube in half, resulting in two shorter tubes. (Note that this is optional. You could use the entire tube if you feel like the plants you're growing need more room for their roots to stretch out before they are transplanted or moved to a larger container.)


3. Take one of those half-tubes and decide which end will be the "bottom" of your peat pod. Make a few cuts in the bottom of the tube so that you will be able to fold it in on itself.


3. Fold in the bottom of the half-tube, making sure the bottom of it is mostly closed. Repeat until you have as many folded half-tubes as needed.


4. Place these tubes in a water-proof tray of some sort.


5. Fill each with seed starting medium or a lightweight potting soil.


6. Plant seeds as directed.
7. Water these by pouring water into the tray, not by pouring it directly onto the soil.
8. My general rule of thumb is to transplant these, tube and all, into a newspaper/Jiffy pot with potting soil soon after they develop their first set of "true leaves."

Cheaper Than Those Biodegradable Jiffy Pots: Jiffy pots are also very convenient, but there's a nearly free alternative to these as well. You'll need to make sure you have a tray or tub with sides as high as the pots will be tall, but you can make newspaper pots, the creation of which I illustrated last year.

Cheaper Than Fancy Trays: You can use damn near anything as a water-proof tray to hold your seedlings. I love using plastic food containers that used to hold things like bakery cookies. Plastic dish tubs from the dollar store are useful, especially when seedlings have been moved to larger newspaper or Jiffy pots. On the smaller scale, butter tubs (or a spreadable cheese tub, like I used in the pictures above) do well. Amazingly, Skinny Cow ice cream sandwich containers fit the toilet paper tube "pods" (and actual peat pods) perfectly, and they also fit right onto our windowsills. Just make sure that anything you use that once contained food has been cleaned out properly.

Cheaper than Grow Lights: Grow lights can help prevent leggy seedlings, but they're also pretty expensive. A cheaper option would be to hang an inexpensive shop light over your seedlings instead. Or, like me, you can simply grow your seedlings on south-facing windowsills and deal with the fact that they'll be a tad bit leggy. (Sunlight is FREE!)

Cheaper than Buying Plastic Seedling Cells: Some people buy the little six-pack plastic cells when, just last year, they might have purchased flowers from the garden center in a nearly identical six-pack. Whenever I buy flowers (or other plants) in cells or small pots sturdy enough to still be in one piece after removal of the flowers, I rinse that sucker out and stash it away in my garage to use for flowers from seed the next year. (They also work for most veggies from seed, unless they have delicate roots.)

Cheaper than Any of That Other Stuff: This won't work with some seeds (read your packets!), but sometimes you can wait until the appropriate time to direct-seed them into the garden. My favorite thing about this method, to be honest, has little to do with money... it's the fact that there's no hardening off to be done at all. How convenient.

That's about all I can think of at the moment. Please post and share your ideas!

Monday, January 26, 2009

Budget Gardening: Seeds

I have to confess that I occasionally let myself spend a little more on gardening than I need to, but that doesn't change the fact that gardening can be a wonderful way to save money on food. There are so many aspects to this that I'm going to tackle them one at a time. First up, seeds.

Seeds save you money in the first place, because they cost so much less than buying seedlings from the garden center. On top of that, there are so many ways to cut corners on seeds. Let's start by considering two general schools of thought on how you can save money, then we'll get to some specific tips.

The first school of thought is pretty short-term: buy cheap seeds. You don't have to spend a fortune on heirloom varieties from organic companies to have a nice garden. Just the other day, I saw a small rack of 20 cent packets of seeds for veggies and herbs at Wal-Mart. It was a small selection, but one could have certainly designed a decent vegetable garden from that rack alone... and probably for no more than a couple dollars. I have also seen similar deals at The Dollar Tree and am sure they will have them again this year. It's really nice when you can support small businesses with good philosophies, but sometimes nothing beats a huge discount chain when you're honestly not even sure you'll be able to pay the electricity bill.

The second school of thought is more long-term: invest in quality heirloom varieties and save seed from your plants every year. Unlike many of the cheap seeds, the seeds you save from an heirloom variety will usually grow true to type the next year. (Edit: As a commenter pointed out, some of those dirt-cheap seeds will grow true to type when you save seed because most hybrids are in the middle price range rather than the lowest. I recommend you do your research on Dave's Garden before you save seed, to make sure.) They cost more up front (anywhere from $2 to $5 a packet) but, in theory, you won't ever have to buy seeds for the same vegetable again.

A lot of gardeners will tell you that the second school of thought is the right school of thought, but I'm here to tell you to do what works best for you. Expensive heirloom or cheap hybrid, it's going to feel wonderful to harvest those veggies no matter what. And even the most "boring" hybrid variety is going to taste 10 times better than the trucked-in vegetables from the grocery store. I think everyone should try heirloom varieties at some point, but if it's not in your budget this year, then it's simply not in your budget.

Here are some other important tips on saving with seeds:
  • No matter what kind of seed you purchase, don't throw out your extras. Almost every seed is viable for more than one season, and some are viable for many, many seasons to come. Tape up the packets, put them all into one ziplock bag/tupperware/mason jar, throw in a handful of uncooked rice to absorb moisture, and store them in the back of your refrigerator until the next gardening season.
  • Share seeds or seedlings with other gardeners, for free! The cheapest way to do this is to go as local as possible. For example, a friend who lives a couple blocks from me recently started a Facebook Group for Oklahoma City gardeners. Many of us have already offered up extra seeds and seedlings. (We also plan on exchanging excess produce. There's a lot of potential with something like this!) If you can't find local friends or a similar local group/community for free, then check out non-local options like Dave's Garden.
  • Don't over-seed. For seeds that are normally sowed directly into the ground, many gardeners pour out the whole packet down a row then thin them out as they grow. How wasteful! Instead, figure out what the spacing should ultimately be and plant two or three seeds where the plants will need to be. For example, if you're planting a row of carrots and they are supposed to be 3 inches apart when mature, then plant two or three carrot seeds each in tiny holes every three inches. Now you waste far fewer seeds because you only need to thin out one or two per hole. (Share or store what you saved!)
  • Shop around. I prefer heirlooms, but they're normally more expensive than I prefer. After doing a little research, I decided that Victory Heirloom Seeds was the best priced company that matched my needs.
  • Pay attention to shipping prices! Ordering seeds, as apposed to going directly to the store, is a great way to find interesting varieties at reasonable prices... but sometimes there's a huge Shipping and Handling fee attached to those otherwise reasonable prices. (Again, I feel that Victory Heirloom Seeds has fair S&H fees.)
  • Save seeds from the garden vegetables people give you, or experiment with the seeds saved from organic produce at your local health food store.
  • If you can't buy all heirloom seeds but want to experiment with saving seeds, then either choose one vegetable (tomatoes are easy!) to buy as an heirloom for seed saving or do some research to see if any of your cheap varieties grow true to seed. (Dave's Garden is a good source for this.)
That's all that comes to mind at the moment. Eveyone feel free to comment with your own ideas!

Next budget topic, seed starting.

Saturday, July 5, 2008

It's Been a While!

It's been a little while since I updated, but here I am now!

We've gotten two big cucumbers out of the garden lately, plus lots of cherry tomatoes!  In fact, I served a bowl of cherry tomatoes as a snack when we had friends over the other night.

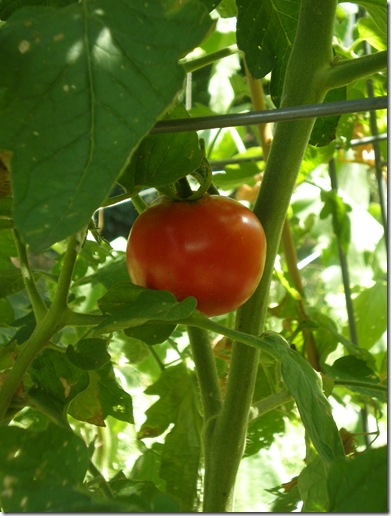
Most exciting is our first full-sized red tomato of the season!  A Genovese, to be specific:P7050100We'll most likely pick and eat it tomorrow.

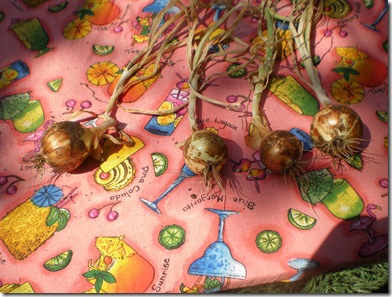
No more carrots in the garden until it's time to seed for the fall.  A few of the onion tops turned yellow, so those got pulled:P7020075 They'll probably be drying outside for about another day, then I'll bring them inside for use/storage.  Most of the others will be picked quite soon as well.

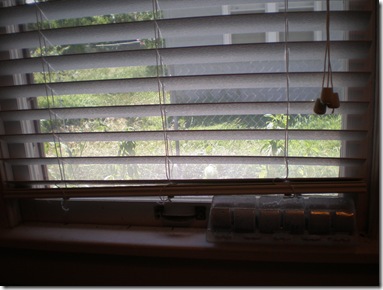
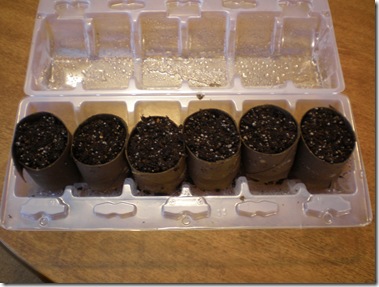
It's also time to start thinking about fall crops, around the Oklahoma City area.  Broccoli should be started inside ASAP, if you haven't done it already.  Here's my broccoli seedling set up on the kitchen window sill:P7050105 It's actually a Skinny Cow ice cream sandwich container!!!  This, if nothing else, is a perfect excuse to eat ice cream!  Not only does it sit perfectly on our windowsill, but our repurposed toilet roll seedling pots fit into each sandwich slot perfectly:P7050106 These little pots are extremely easy to make. Cut the rolls in half first if putting them in a short container like this, but otherwise follow these instructions over at You Grow Girl.  Just be careful not to over-water, because I find that these are more likely to grow mold than peat pellets.  But once the seedlings need more soil, you can transplant it, roll and all, into its next home.  It's totally biodegradable.

Anyone else prepping for fall gardening out there?!  Here's a fabulous fall gardening document for fellow Oklahomans, thanks to OSU.

Thursday, June 12, 2008

Seed Sales!

Apparently, it's about time for seeds to go on sale around Oklahoma City!  Lowe's had theirs for 10 cents a packet yesterday, and Chad and I must have picked up about $30 worth for less than $2.  He picked out flower seeds, including three or four varieties of sunflowers, and I mainly picked out vegetables.  Almost all of it is for next year, but we picked up a few things that should work well in the fall, too.

So, keep your eye out for sales right now.  When it comes to vegetables, pretty much everything with which I am familiar will store well for at least one extra year, except onions.

Friday, April 11, 2008

June-Bearing Strawberries

Strawberry update!!!

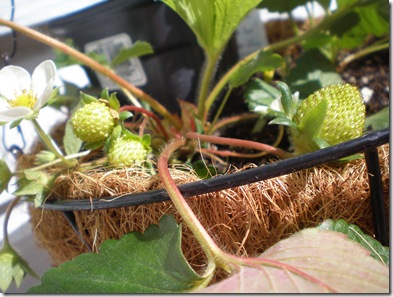
I have a basket of June-bearers just outside my back door that is just a pleasure to watch. First of all, the older of the two plants in that basket is already growing strawberries!

P4100149

The plant on the other side of the basket has been in it's sunny little home for only a day. You see, I'd decided I had more than enough strawberry plants with all those Alexandrias... but I'm still so drawn to them! So I stopped by the garden center at hell Wal-Mart while running an errand there yesterday and looked at all of their lovely strawberry plants. Some had berries already, but looked like they were in terrible shape. (Actually, just about everything was in bad shape there. I don't know if it was because they weren't sheltered in the recent storm or because it was Wal-Mart.) But next to those were beautiful, broad-leafed strawberry plants boasting a claim to pink blossoms, and all I could think about was how lovely that would look paired with the white-blossoming plant above.

I touched and sniffed and looked for interesting leaves. Then I picked up one plant and it seemed to tug right back, unwilling to leave its brothers and sisters. A little gentle investigation revealed that it had set out two runners into the separate pots of two other plants, so this was in fact three strawberry plants in one. At 88 cents a pot, how in the world could I pass up an experiment like this? I snatched it right up.

Once home, I snipped off the larger of the baby strawberry plants and put it in a pot. It already had a good start on its roots, you see, so it was time to take that work load off of the mother plant. The other one only had a few roots though, so I rigged up the set up you see below:

P4100147

Basically, I potted the mother plant in her forever-home then dug a shallow indentation next to her so that I could pot the baby separately without cutting the runner it was attached to. I'll give it a few days to establish itself, then I'll "cut the cord" for the mother's sake.

That's the thing about runners. You end up with more plants, but the process takes a lot of energy from the mother plant. You have to cut the runners off if you want berries from the mother. If you don't want to sacrifice berry production in order to gain baby strawberry plants, then you want to cut the runners at first sight.

That said, you can also use this method to increase next year's berry yield significantly if you're in a warm environment or can otherwise over-winter the plants. Pinch off any blossoms as they appear, let those runners take root and grow a bit before cutting the cord, and then you'll have tons of plants for next year.

As for me, I'll stick with these two runners and snip anymore that show up. I really only got the June-bearers for instant gratification. Next year, I should be up to me ears in berries from the ever-bearers!

Saturday, March 22, 2008

A Simple Gift

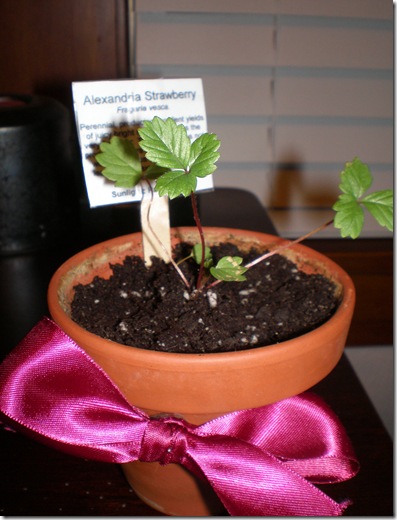
Plants make great gifts. I'm taking this little strawberry plant to a birthday party tonight. It's one of the dozens I've grown from seed and I just spruced up an old pot with a scrap ribbon. Plant tags make a nice touch, and they don't have to be anything fancy, though crafty touches are much more impressive. In this case, I just printed it, cut it, and taped it to a craft stick. Voila! An inexpensive gift almost anyone can appreciate.

P3220050