Showing posts with label DIY. Show all posts

Thursday, April 17, 2008

Strawberry Pot Watering System from Soda Bottles!

I absolutely hate my strawberry pot. It's difficult to plant and the water tends to just pour right out the side holes before reaching the lower soil. Lovely.

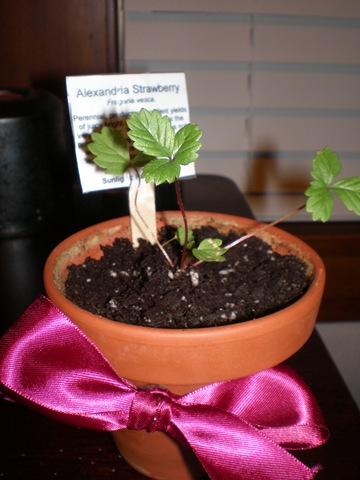
But seeing as I was up to my eyeballs in Alexandrias and Chad was so tickled by the idea of strawberries in a strawberry pot, I decided to give it a go again this year... with one adjustment.

You see, the lower plants never get any water if the water just pours out the sides. This seemed like something I could actually fix. A little googling revealed that some other gardeners drill holes in a length of PVC pipe, stick it in the pot, pour soil around it, and plant the strawberries. Very clever, verrry clever indeed...

But the only PVC pipe I had was too skinny and so ancient I was afraid it would leach scary chemicals into the soil and I really didn't want to go buy a new one and deal with drilling. So I decided to do one of my favorite things ever: reuse trash!

So, here's how to make a watering system for your strawberry plant....

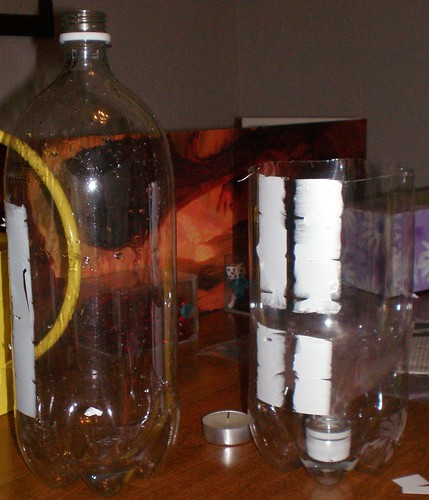
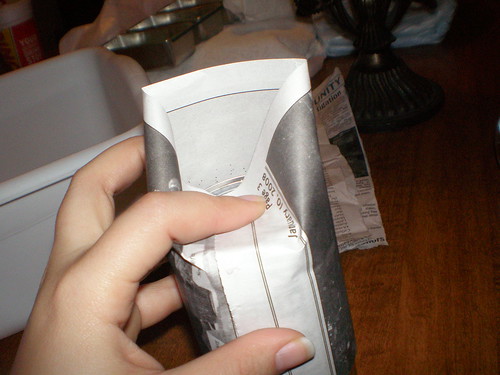
1. Dig small coke bottles out of the recycling bin. How many you need depends on how tall your strawberry pot is. (Mine comes up to my knees and I used three bottles.) Rinse them, remove their labels, and cut off the bottoms. Be sure to keep one of the caps.

P4050032

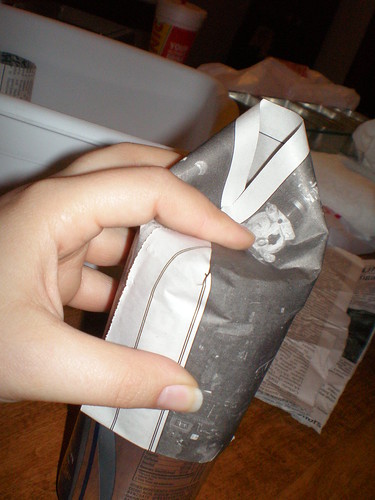
2. Now, you need to stick the bottles inside of each other, in a sort of daisy-chain way, to create a pipe effect. Tape them all together, sealing the seams well, with packaging tape. Please note that none of the "inside" bottles should have caps on!

P4050033 P4050034

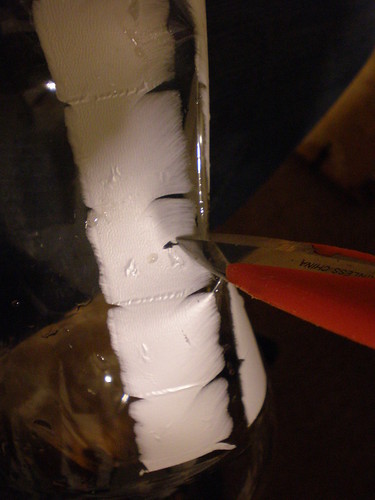
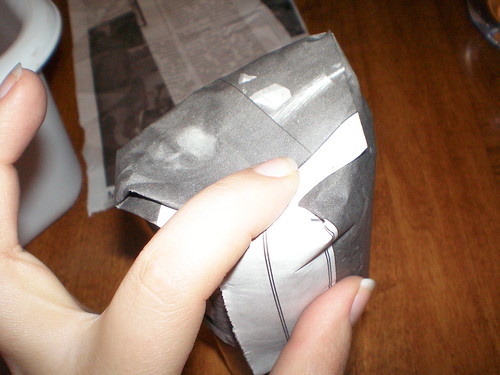
3. Next step is to melt or drill holes in the bottles. With thin plastic like this, I'd vote for melting. Make sure you do this in a ventilated area. The basic steps are:
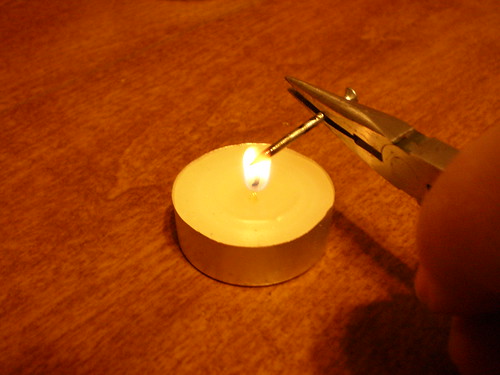
a. light a candle

b. hold a nail in the flame with a pair of pliers, not your bare hand

c. once hot, make holes by poking the nail into the plastic

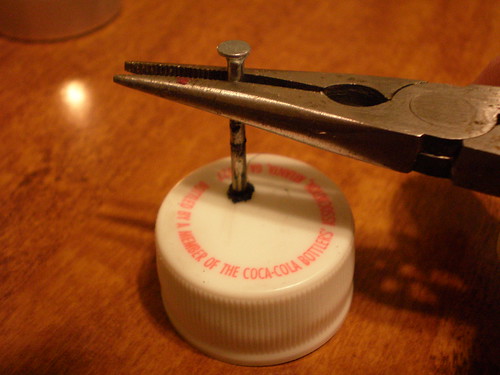
You'll need to reheat the nail every now and then, but it makes for pretty quick work. (For illustrations on how to do this, see how I melted holes in the plastic caps for these recycled pots.)

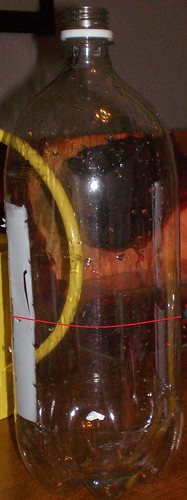
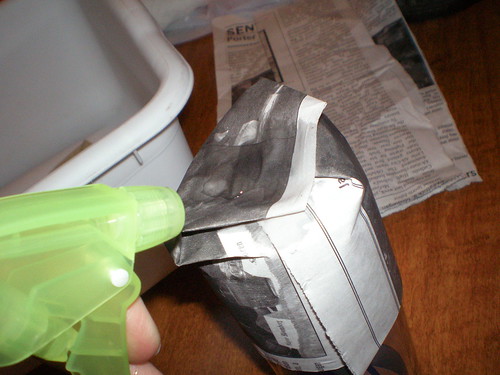
4. Once you have a few holes in each of the bottles, put the cap on the one exposed bottle top and see how the system fits into the pot. As long as it's tall enough to come above the soil line, you're good! Trim the top bottle if it sticks way above the pot's lip.

P4050036

5. Once ready to go, hold the bottle in place and dump in enough soil around it to reach the first set of holes. It should stand fairly sturdy as you now continue to plant each of your strawberry plants. (Note that you may want to stuff a cloth in the top while you pour in the soil, to avoid getting soil in the watering system.
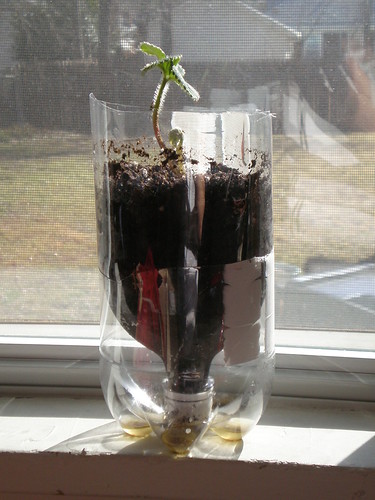
My end result:

P4170065 P4170066

It works well, but I do wish now that I'd trimmed down the top bottle just for appearances. But all of the plants that looked healthy going into the pot look healthy after a couple weeks of living there. I'm pretty pleased with how evenly this seems so moisten the soil, and I think the plants are pretty happy about it too. The only drawback I can really think of is that all plastic (even PVC!!!) starts leaching chemicals as it ages. I'd probably replace the tower of bottles every year, which shouldn't be too tough once the pot is filled with roots.

Saturday, March 22, 2008

A Simple Gift

Plants make great gifts. I'm taking this little strawberry plant to a birthday party tonight. It's one of the dozens I've grown from seed and I just spruced up an old pot with a scrap ribbon. Plant tags make a nice touch, and they don't have to be anything fancy, though crafty touches are much more impressive. In this case, I just printed it, cut it, and taped it to a craft stick. Voila! An inexpensive gift almost anyone can appreciate.

P3220050

Wednesday, January 30, 2008

Soda Bottle Pots

Time to raid the recycling bin!

This is a little trick I use when I don't have enough pots for relatively small plants. The single serving soda bottles are perfect for seedlings and the two-liters are great for something a little more substantial. Since my husband has a Diet Dr. Pepper addiction, I have a nearly endless supply of the two-liters....

Bottle Pots Before & After

Get a hold of your bottle, remove the label, and rinse it out. Now that it's clean, the first major step is to slice the bottle roughly in half. It'll take you a couple tries before you know just how deep you want each "half" to be. I usually cut mine just a bit below the half-way mark (as shown below), making the top part (which will hold the soil) as deep as possible. As long as the top half sits will in the bottom half, just go with whatever variation suits your purposes.
Slice the Pot in Half

The most attractive way to cut the bottle in half is to pick your spot, turn it on it's side, and saw through it carefully. You'll need either a fine-toothed saw or a very large kitchen knife you don't care too much about. Another option, though a less attractive one, is to hack at the bottle with kitchen shears. That's what I did this time around, since these pots are temporary anyway. To get it started, you may need to pinch part of the bottle and snip it, then unpinch it and start cutting your way around.
Start the Cut

Now you should have the makings of a soda bottle pot before you! If the top inverts into the bottom as you like, let's start thinking about drainage. Leaving the cap on won't allow any drainage at all, but taking it off will mean all of your soil washing into the bottom. The solution is to put some holes in the cap. If you have a drill handy, use that. If you don't, then here's what I do when I don't feel like digging out the drill for small jobs. Take a nail and hold the end of it in a flame with a pair of pliers for about 15 or 20 seconds. The blue part of the flame is the hottest, so aim for that.
Heat the Nail

Now, still using the pliers, quickly but carefully press the tip of the hot nail through the cap as shown below. If your nail is hot enough, it should melt right through with just a little pressure. Three holes should do it, but you'll need to reheat the nail between each hole. Please make sure you're in a well ventilated area so you're not breathing chemicals from the melting plastic.
Melt Holes

Put that cap back on the bottle, invert the top into the bottom, fill with soil, and plant! This one is pretty ugly. It was a rush job, just to get the baby strawberry plant into some soil. You can cut it much more nicely and even decorate it if the pot will be used long-term.
Finished Bottle Pot

When you're done with the pot, please don't forget to recycle it!!!

Tuesday, January 22, 2008

Onion Sprouts and Newspaper Pots

A few days ago, I decided to start some onion seeds....

I sprouted them in this plastic take-out tray. I cut a piece of paper bag to fit the bottom, sprayed it until it soaked up the water, and sprinkled onion seeds in. Once the top is snapped shut, it stays nice and moist. I kept them near a sunny window to stay warm. And tonight, they were ready to go.
Onion Sprouts

A close-up:
Onion Sprouts Close-Up

Time to put them into some soil! It's far too cold out even for cool-weather crops, though. Newspaper pots to the rescue! After a little trial and error, here's how I made them....

You'll need black and white newspaper, a soda can, a tray or small tub, a spray bottle, and potting soil.
Newspaper Pot Materials

Cut or tear black and white newspaper into single pages and then into into quarters.
Paper

Take one of those quarters and make any adjustments to size that would be appropriate for your purposes. I folded one edge over, as shown below, to make them shorter and more uniform.
Fold the Paper

Now, wrap the paper around a soda can, letting a couple inches extend beyond the top of the can. It should overlap itself. Notice that I have put my fold on the bottom, which lets the ragged end extend beyond the can.
The Overlap

Now we're going to form the bottom of the pot. At the overlap, fold the paper over the top of the can.
Fold #1

Fold it a second time, leaving just a point of paper.
Fold #2

Fold that final point down. Voila! You've just formed a biodegradable seedling pot!
Fold #3

But it's not going to stay together all by itself. I found that it helped to spritz the folds of the pot bottom as well as the edge of the overlap.
Dampen the Folds

Place them all in the tray or tub. They should be somewhat snug, so that they will help each other hold their forms, but not crushed together. Voila!!! Your very own biodegradable seedling pots for FREE!
Snug in a Tub

They held their forms quite nicely once they were all nested and filled with soil. Here I am making indentations for my onion seeds.
Pots Filled With Soil

I put in the 16 healthiest looking sprouted seeds, covered them, gently misted the soil with the spray bottle until it looked nicely moist on top, then poured water into the tub itself to allow the pots to soak it up. I'll primarily water them by misting heavily, since I didn't set up the tub to allow the pots to drain. (You could do so by putting a layer of rocks beneath them.)
Watering

I put plastic wrap over it to hold in the moisture and keep out the cats, and I'll make room for it in the sunny laundry room tomorrow.

Once ready to plant, I can just plop the pots in the ground and the paper will biodegrade and become part of the soil. If you make these, keep in mind that they aren't as sturdy and peat pots. You may want to double the thickness if you're concerned about them falling apart when you lift them out, but I plan on lifting them out with a kitchen spatula while holding them with my other hand. Once plopped in the ground, I want them to fall apart as quickly as possible.

One other note: I'd avoid color newspaper. I've read in more than one source that you shouldn't compost newspaper with colored ink if the compost is going into a vegetable garden, so I'd venture to guess that you should keep those colored inks out of your garden entirely.